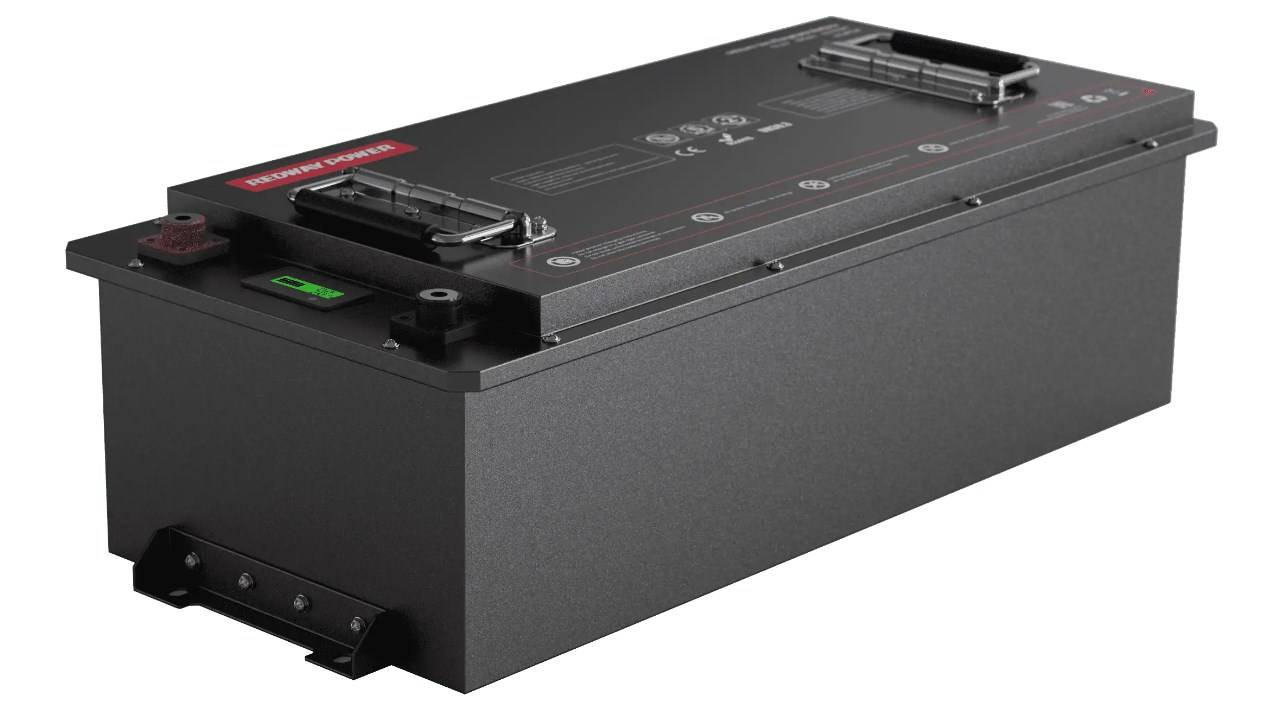
Building a high-capacity 12V 560Ah lithium battery pack for your RV can provide reliable power for all your adventures. This guide outlines the necessary materials, assembly steps, safety precautions, and advantages of using lithium technology, ensuring you create an efficient and durable power source for your recreational vehicle.
What materials are needed to build a 12V 560Ah lithium battery pack?
To construct a 12V 560Ah lithium battery pack, you will need the following materials:
- Lithium Iron Phosphate (LiFePO4) Cells: Choose high-quality cells such as EVE LF280 or similar.
- Nickel Strips: For connecting the cells in series or parallel configurations.
- Battery Management System (BMS): To monitor cell voltages and temperatures.
- Soldering Equipment: For secure connections between cells.
- Heat Shrink Tubing: For insulating connections.
- Protective Casing: To house the battery pack safely.
- Multimeter: To test voltage and ensure proper connections.
Chart: Required Materials Overview
| Material | Purpose |
|---|---|
| LiFePO4 Cells | Main energy storage |
| Nickel Strips | Electrical connections |
| BMS | Safety and monitoring |
| Soldering Equipment | Secure connections |
| Heat Shrink Tubing | Insulation |
| Protective Casing | Safety enclosure |
| Multimeter | Voltage testing |
How do you assemble the battery pack step-by-step?
Here’s a step-by-step guide to assembling your 12V 560Ah lithium battery pack:
- Prepare the Cells: Gather your LiFePO4 cells and ensure they are all at similar voltage levels before starting assembly.
- Connect Cells in Series/Parallel: Depending on your configuration, connect the cells using nickel strips:
- For a 12V configuration, connect four cells in series (each cell typically provides about 3.2V).
- Ensure proper polarity when connecting.
- Solder Connections: Use soldering equipment to secure connections between nickel strips and cells, ensuring no short circuits occur.
- Install BMS: Connect the BMS according to its wiring diagram, ensuring it monitors each cell’s voltage correctly.
- Insulate Connections: Use heat shrink tubing to cover all exposed connections for safety.
- Encase the Battery Pack: Place the assembled battery into a protective casing to shield it from physical damage.
Chart: Assembly Steps Summary
| Step | Action |
|---|---|
| Prepare Cells | Check voltage levels |
| Connect Cells | Nickel strips for series connection |
| Solder Connections | Securely attach with solder |
| Install BMS | Follow wiring diagram |
| Insulate Connections | Use heat shrink tubing |
| Encase Battery Pack | Protect from damage |
What safety precautions should be taken during assembly?
Safety is paramount when assembling lithium batteries. Follow these precautions:
- Wear Protective Gear: Always use gloves and goggles to protect against accidental spills or short circuits.
- Work in a Ventilated Area: Ensure good airflow to avoid inhaling fumes from soldering or potential gas release from batteries.
- Avoid Overheating: Be cautious not to overheat cells during soldering; excessive heat can damage them or cause thermal runaway.
- Keep Flammable Materials Away: Maintain a clean workspace free from flammable items to reduce fire risk.
- Inspect Components Regularly: Check for any signs of wear or damage throughout the assembly process.
Chart: Safety Precautions Checklist
| Precaution | Description |
|---|---|
| Wear Protective Gear | Gloves and goggles |
| Work in Ventilated Area | Prevent gas buildup |
| Avoid Overheating | Control heat during soldering |
| Keep Flammable Materials Away | Maintain a clean workspace |
| Inspect Components Regularly | Check for wear or damage |
Why is a Battery Management System (BMS) important for lithium batteries?
A Battery Management System (BMS) is crucial for several reasons:
- Cell Monitoring: It continuously monitors individual cell voltages and temperatures, preventing overcharging or deep discharging.
- Safety Features: The BMS provides protection against short circuits, overcurrent, and thermal events, enhancing overall safety.
- Performance Optimization: By balancing cell charge levels, it maximizes battery lifespan and performance efficiency.
Chart: Benefits of Using a BMS
| Benefit | Description |
|---|---|
| Cell Monitoring | Tracks voltage and temperature |
| Safety Features | Prevents overcharge and short circuits |
| Performance Optimization | Balances charge levels |
What are the benefits of using lithium batteries in RV applications?
Lithium batteries offer several advantages for RV applications:
- Higher Energy Density: Lithium batteries provide more energy per unit weight compared to lead-acid batteries, making them ideal for space-constrained environments like RVs.
- Longer Lifespan: With proper management, lithium batteries can last up to 10 years or more, significantly outlasting traditional lead-acid options.
- Deeper Discharge Capability: Lithium batteries typically allow for deeper discharges (up to 80% DoD), providing more usable energy without damaging the battery.
- Faster Charging Times: They charge more quickly than lead-acid batteries, allowing RV owners to replenish energy faster during trips.
Chart: Lithium vs. Lead-Acid Batteries
| Feature | Lithium Batteries | Lead-Acid Batteries |
|---|---|---|
| Energy Density | Higher | Lower |
| Lifespan | Up to 10 years | 3-5 years |
| Depth of Discharge (DoD) | Up to 80% | Around 50% |
| Charging Time | Faster | Slower |
Latest News
As of early 2024, advancements in lithium battery technology continue to enhance their appeal for RV applications. New developments focus on improving energy density and reducing costs, making high-capacity options like the 12V 560Ah models increasingly accessible for recreational vehicle enthusiasts looking for reliable power solutions.Editor Comment
“The shift towards lithium technology in RVs represents a significant advancement in energy storage,” says Dr. Laura Simmons, an expert in renewable energy systems. “With their superior performance characteristics and decreasing costs, lithium batteries are becoming an essential component for modern RV living.”


